Introduction
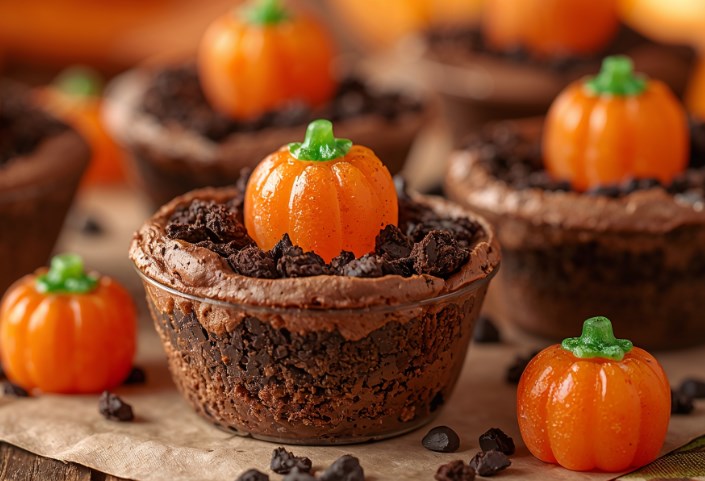
If you’re looking for a no-bake Halloween dessert that’s festive, easy, and kid-friendly, then these Pumpkin Patch Dirt Cups with Gummy Pumpkins are the perfect choice. They’re built with layers of creamy chocolate pudding, crushed Oreo “dirt,” and decorated with gummy pumpkins to look like a miniature pumpkin patch. Not only do they look absolutely adorable, but they’re also rich, chocolatey, and irresistible.
These dirt cups are a fantastic dessert for Halloween parties, fall gatherings, school events, or even a cozy family night at home. They’re fun to make with kids because decorating each “pumpkin patch” becomes a creative little project.
Why I Love This Recipe
love this recipe because it perfectly combines fun, creativity, and flavor in one easy dessert. The moment you see the layers of creamy chocolate pudding topped with crushed Oreo “dirt” and bright orange gummy pumpkins, it instantly brings a smile and sparks excitement. It’s more than just a treat—it’s a miniature Halloween scene in a cup!
Another reason I adore it is how kid-friendly and interactive it is. Kids can help assemble the layers, sprinkle the “dirt,” and place gummy pumpkins or candy worms, which turns dessert-making into a fun Halloween activity.
I also love that it’s quick and fuss-free. No baking is required, yet it looks impressive enough for a party or holiday gathering. The combination of creamy pudding, crunchy Oreos, and chewy gummy pumpkins creates a delightful mix of textures that makes each bite a little adventure.
Why It’s a Must-Try Dish
Pumpkin Patch Dirt Cups with Gummy Pumpkins are a must-try because they perfectly capture the spirit of Halloween in a dessert. The combination of creamy chocolate pudding, Oreo “dirt,” and playful gummy pumpkins creates a visually stunning and festive treat that delights both kids and adults.
- Fun and Festive: Each cup resembles a mini pumpkin patch, making it not just a dessert, but a conversation starter and a centerpiece for your Halloween table.
- Kid-Friendly: Children will love both assembling and eating these cups. The interactive aspect of decorating with gummy pumpkins, candy worms, or icing vines makes it engaging and hands-on.
- No-Bake Convenience: This recipe is quick and easy, requiring no baking, which makes it stress-free for busy hosts who still want a show-stopping Halloween dessert.
- Customizable Creativity: You can modify the dessert with different flavors, colors, or additional candy decorations to match your Halloween theme. From spooky “graveyard” variations to cute pumpkin patches, the options are endless.
Preparation and Cooking Time
- Preparation Time: 20 minutes
- Cooking Time: 0 minutes (no-bake)
- Total Time: 20 minutes + chilling time (optional)
Servings and Nutrition
- Servings: 6 dirt cups
- Calories: ~280 per serving (varies based on pudding, toppings, and cookie amounts)
- Course: Dessert
- Cuisine: American / Halloween-themed
Ingredients
For the Dirt Cups:
- 1 package (3.9 oz) instant chocolate pudding mix
- 2 cups cold milk
- 1 cup whipped topping (Cool Whip or homemade whipped cream)
- 20 Oreo cookies, finely crushed
For Decoration:
- Gummy pumpkins (or candy corn pumpkins)
- Green icing or green candy melts (to pipe vines and leaves)
- Optional: candy worms, candy corn, or chocolate rocks for extra decoration
Step-by-Step Preparation
Step 1: Make the Pudding
- In a mixing bowl, whisk together the instant chocolate pudding mix and cold milk for about 2 minutes until smooth.
- Let the mixture sit for 5 minutes to thicken.
- Gently fold in the whipped topping to make it light and fluffy.
Step 2: Crush the Oreos
- Place the Oreo cookies in a food processor and pulse until finely crushed.
- Alternatively, place them in a sealed bag and crush with a rolling pin.
Step 3: Assemble the Dirt Cups
- Spoon a layer of pudding mixture into the bottom of each clear cup.
- Sprinkle a generous layer of crushed Oreos on top to resemble dirt.
- Repeat layers if desired, finishing with a top layer of Oreo dirt.
Step 4: Decorate the Pumpkin Patch
- Place gummy pumpkins on top to look like they’re growing in the “dirt.”
- Pipe green icing vines and leaves around them for a realistic touch.
- Add gummy worms, candy corn, or chocolate rocks if you want to make it extra spooky.
How to Serve
Serve in clear plastic cups or small mason jars so the layers are visible. Place the dirt cups on a Halloween-themed tray decorated with fake leaves or cobwebs for extra effect. Best served chilled with a spoon.
Recipe Tips
- Use double-stuffed Oreos for extra creaminess in the dirt layer.
- Make in mini cups for bite-sized party servings.
- Chill the pudding layer for 30 minutes before adding Oreos to keep the cookie crumbs crisp.
- Involve kids—let them decorate their own pumpkin patches!
Variations
- Pumpkin Patch Graveyard – Add tombstone cookies and candy skeletons.
- Adult Version – Add a splash of Baileys or Kahlua to the pudding for a boozy dessert.
- Fall Flavor Twist – Use pumpkin spice pudding instead of chocolate.
- Glow-in-the-Dark Patch – Add tonic water to the pudding mix and serve under blacklight for a glowing effect.
Freezing and Storage
- Storage: Keep in the refrigerator for up to 3 days. Decorate just before serving for the freshest look.
- Freezing: Not recommended, as pudding and whipped topping lose texture after thawing.
Special Equipment Needed
- Mixing bowl and whisk
- Food processor or rolling pin (for crushing Oreos)
- Clear plastic cups or jars for serving
- Piping bag (for green vines and leaves)
Conclusion
These Pumpkin Patch Dirt Cups with Gummy Pumpkins are the perfect no-bake Halloween dessert—cute, festive, and irresistibly delicious. They’re quick to assemble, fun to decorate, and guaranteed to be the highlight of any Halloween spread. Whether you’re making them for kids or adults, they bring a touch of whimsy and creativity to your fall celebrations.

Pumpkin Patch Dirt Cups with Gummy Pumpkins
Description
If you’re looking for a no-bake Halloween dessert that’s festive, easy, and kid-friendly, then these Pumpkin Patch Dirt Cups with Gummy Pumpkins are the perfect choice.
Ingredients
For the Dirt Cups:
For Decoration:
Instructions
-
Step 1: Make the Pudding: In a mixing bowl, whisk together the instant chocolate pudding mix and cold milk for about 2 minutes until smooth. Let the mixture sit for 5 minutes to thicken. Gently fold in the whipped topping to make it light and fluffy.
-
Step 2: Crush the Oreos: Place the Oreo cookies in a food processor and pulse until finely crushed. Alternatively, place them in a sealed bag and crush with a rolling pin.
-
Step 3: Assemble the Dirt Cups: Spoon a layer of pudding mixture into the bottom of each clear cup. Sprinkle a generous layer of crushed Oreos on top to resemble dirt. Repeat layers if desired, finishing with a top layer of Oreo dirt.
-
Step 4: Decorate the Pumpkin Patch: Place gummy pumpkins on top to look like they’re growing in the “dirt.” Pipe green icing vines and leaves around them for a realistic touch. Add gummy worms, candy corn, or chocolate rocks if you want to make it extra spooky.