Introduction
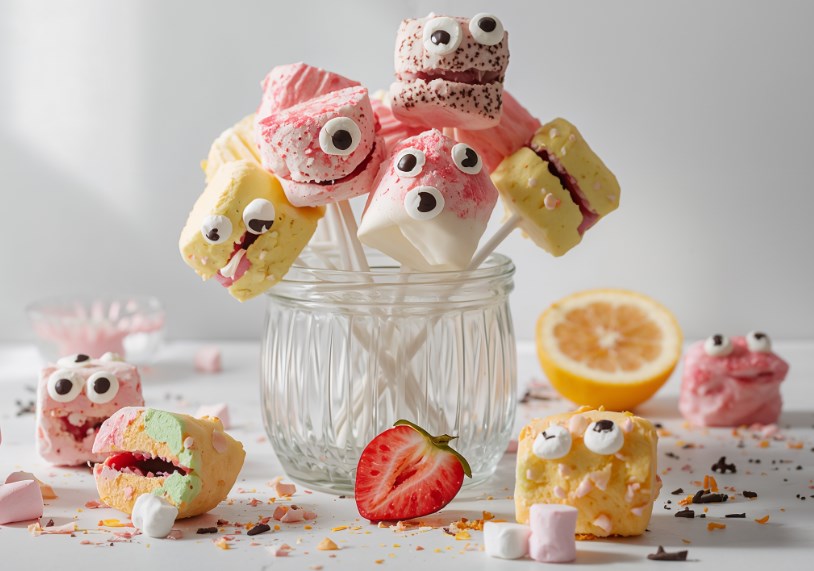
Halloween is all about playful creativity, and these Monster Marshmallow Pops deliver exactly that. They’re fluffy marshmallows dipped in colorful candy melts or chocolate, decorated with candy eyes, sprinkles, and silly faces to look like goofy, spooky monsters.
These treats are no-bake, easy to assemble, and endlessly customizable, making them the perfect activity for kids and families. They’re not just tasty—they’re a conversation piece and a party showstopper.
Why I Love This Recipe
I love this recipe because it combines everything I enjoy about Halloween treats:
- Fun decorating—each marshmallow becomes a unique monster.
- Simple prep—no baking, just dipping and decorating.
- Interactive—kids love helping, from dipping marshmallows to sticking on candy eyes.
- Portable & shareable—perfect for classroom treats, party favors, or dessert tables.
Every time I make these, I end up laughing at the funny monster faces. They’re as enjoyable to create as they are to eat.
Why This Is a Must-Try Dish
- Beginner-friendly—great for kids and adults alike.
- Customizable—use any color, candy, or face design.
- Quick to make—ready in under 45 minutes.
- Party-perfect—grab-and-go treats for Halloween gatherings.
- Budget-friendly—simple ingredients create a big wow factor.
Recipe Information
- Preparation Time: 20 minutes
- Decorating Time: 20 minutes
- Total Time: ~40 minutes
- Servings: 12 pops
- Calories: ~120 per pop
- Course: Dessert / Snack
- Cuisine: American (Halloween-themed)
Ingredients
- 12 large marshmallows
- 12 lollipop sticks or paper straws
- 8 oz candy melts (green, purple, orange, black—your choice)
- 1 tbsp coconut oil or shortening (optional, for smoother dipping)
- Candy eyes (various sizes for goofy looks)
- Halloween sprinkles (bats, bones, stars, etc.)
- Mini M&M’s, Skittles, or small candies (for noses, teeth, or horns)
- Melted white chocolate or candy melts (for details like teeth or scars)
Cooking Directions
- Prepare Marshmallows
- Insert a lollipop stick or paper straw into each marshmallow.
- Melt Candy Melts
- In a microwave-safe bowl, melt candy melts with a little coconut oil in 20-second intervals until smooth.
- Dip the Marshmallows
- Dip each marshmallow into the melted candy coating, covering completely.
- Tap gently to remove excess.
- Decorate the Monsters
- While the coating is still wet, press on candy eyes, sprinkles, and candies to create monster faces.
- Use melted white chocolate for details like teeth, stitches, or fangs.
- Set the Pops
- Place pops upright in a styrofoam block or on parchment paper until set (10–15 minutes).
Step-by-Step Preparation Method
- Insert sticks → prepare marshmallows.
- Melt candy melts → smooth consistency.
- Dip marshmallows → coat evenly.
- Add eyes, sprinkles, and candy decorations.
- Let set → serve or store.
How to Serve
Serve these pops on a Halloween-themed platter or stick them upright in a decorated foam block filled with candy corn. They also make adorable party favors when wrapped in clear treat bags with festive ribbons.
Recipe Tips
- Use different-sized candy eyes to make monsters look sillier.
- Don’t rush the decorating—add details while the candy coating is still tacky.
- Mix and match colors for variety (e.g., green Frankenstein, purple goblin, orange pumpkin monster).
- Store-bought edible markers can add easy details like mouths or scars.
Variations
- Frankenstein Pops: Green coating, black sprinkle hair, and candy eyes.
- Vampire Pops: Black coating, white fangs, and red gel “blood.”
- Mummy Pops: White coating drizzled with extra lines for bandages + eyes.
- Pumpkin Monsters: Orange coating with candy stem and silly faces.
- Galaxy Monsters: Dip in black candy melts and sprinkle with edible glitter.
Freezing & Storage
- Storage: Keep in an airtight container at room temperature for up to 3 days, or refrigerate for up to 1 week.
- Freezing: Not recommended, as marshmallows can become chewy when thawed.
Special Equipment Needed
- Lollipop sticks or paper straws
- Microwave-safe bowls
- Parchment paper or styrofoam block
- Piping bags or edible markers (for details)
Conclusion
Monster Marshmallow Pops are the perfect mix of silly, spooky, and sweet. With colorful candy coatings, goofy eyes, and endless decorating possibilities, they’re guaranteed to bring laughter and joy to your Halloween celebrations. Whether served on a platter, given as treats, or made as a family activity, these pops are a must-try recipe for spooky season.

Monster Marshmallow Pops
Description
Halloween is all about playful creativity, and these Monster Marshmallow Pops deliver exactly that. They’re fluffy marshmallows dipped in colorful candy melts or chocolate, decorated with candy eyes, sprinkles, and silly faces to look like goofy, spooky monsters.
Ingredients
Instructions
-
Prepare Marshmallows: Insert a lollipop stick or paper straw into each marshmallow.
-
Melt Candy Melts: In a microwave-safe bowl, melt candy melts with a little coconut oil in 20-second intervals until smooth.
-
Dip the Marshmallows: Dip each marshmallow into the melted candy coating, covering completely. Tap gently to remove excess.
-
Decorate the Monsters: While the coating is still wet, press on candy eyes, sprinkles, and candies to create monster faces. Use melted white chocolate for details like teeth, stitches, or fangs.
-
Set the Pops: Place pops upright in a styrofoam block or on parchment paper until set (10–15 minutes).